

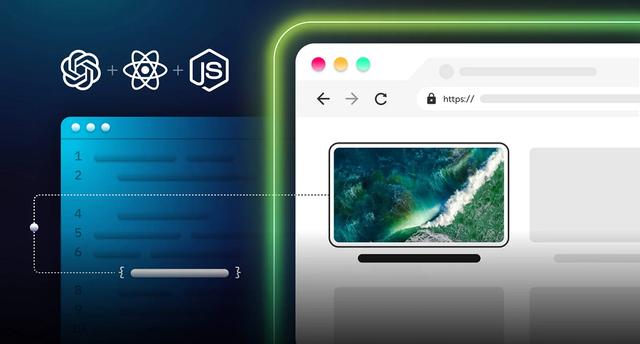
AI驅動的Web App開發實戰(ai驅動是什么)
AI正在接管世界。 這些技術每天都在震撼著我們的世界:ChatGPT 和 Stable Diffusion。ChatGPT 可以使用其 GPT3.5 模型回答世界上的任何問題。Stable Diffusion 是一種文本轉圖像模型,可以將任何文本轉換為圖片。結合這兩種技術是人工智能的未來。

推薦:用 NSDT場景設計器 快速搭建3D場景。
在本文中,我將向你展示如何通過結合兩者來創建一個Web應用。使用 ChatGPT 和 Stable Diffusion,可以 為你提供的任何網站描述生成徽標和合適的域名。
1、Stable Diffusion和ChatGPT
Stable Diffusion 是一種文本到圖像的潛在擴散模型,使用戶能夠根據給定的文本輸入在幾秒鐘內生成圖像。 它還用于諸如內畫、外畫和生成圖像到圖像的轉換等過程。
ChatGPT 是一種由 OpenAI 訓練的 AI 語言模型,可以生成文本并以類似人類的對話方式與用戶進行交互。 用戶可以在幾秒鐘內提交請求并獲得信息或問題的答案,主題范圍廣泛,例如歷史、科學、數學和時事。
在本文末尾,你將了解如何使用 Stable Diffusion WebUI 從文本創建圖像,以及如何從 Node.js 應用程序向 ChatGPT 發送消息。
2、安裝和運行Stable Diffusion Web UI
你可以在 Windows、Linux 和 Apple Silicon 上安裝 Stable Diffusion Web UI。 在這里,我將指導你完成在 Apple Silicon 上的安裝。
前提條件:確保你的計算機上安裝了 Homebrew。 它是一個軟件包,可讓你安裝 Apple 未提供的各種應用程序。
- 打開一個新的終端窗口并運行以下命令來安裝 WebUI 依賴項。
MAC:
brew install cmake protobuf rust python@3.10 git wget
Debian Linux:
sudo apt install wget git python3 python3-venv
Red Hat Linux:
sudo dnf install wget git python3
Arch Linux:
sudo pacman -S wget git python3
- 通過運行以下命令克隆 Web UI 存儲庫:
git clone https://github.com/AUTOMATIC1111/stable-diffusion-webui
- 下載穩定擴散模型(大文件)。 進入目錄 stable-diffusion-webui/models/Stable-diffusion
cd stable-diffusion-webui/models/Stable-diffusion
下載模型—我們將使用 Stable Diffusion 1.5,但你可以隨意下載您想要的任何其他版本。使用下面命令下載模型:
wget https://huggingface.co/runwayml/stable-diffusion-v1-5/resolve/main/v1-5-pruned-emaonly.ckpt
將模型從 v1-5-pruned-emaonly.ckpt 重命名為 model.ckpt
mv v1-5-pruned-emaonly.ckpt 模型.ckpt
- 進入 stable-diffusion-webui 文件夾并運行 Web UI 項目以創建虛擬環境并安裝其依賴項。
cd stable-diffusion-webui./webui.sh
- 訪問本地 URL – http://127.0.0.1:7860 以通過其用戶界面與 Web UI 交互。
要稍后重新啟動 Web UI 進程,請在終端進入 stable-diffusion-webui 文件夾并運行命令 ./webui.sh。 如果要使用Web UI API,使用命令 ./webui.sh –api。
3、構建網絡應用程序
在本節中,我將指導你為 Web 應用程序創建項目環境。 我們將在前端使用 React.js,在后端服務器使用 Node.js。
通過運行以下命令為 Web 應用程序創建項目文件夾:
mkdir stable-diffusion-appcd stable-diffusion-appmkdir client server
3.1 設置 React 應用程序
在終端進入客戶端文件夾并創建一個新的 React.js 項目。
cd clientnpx create-react-app ./
從 React 應用程序中刪除多余的文件,例如徽標和測試文件,并更新 App.js 文件以顯示“Hello World”,如下所示。
Function App() { return ( <div> <p>Hello World!</p> </div> );}export default App;
導航到 src/index.CSS 文件并復制下面的代碼。 它包含設置此項目樣式所需的所有 CSS。
@import url("https://fonts.googleapis.com/css2?family=Space Grotesk:wght@300;400;500;600;700&display=swap");* { box-sizing: border-box; margin: 0; padding: 0; font-family: "Space Grotesk", sans-serif;}.app,.loading,.result__container > div { display: flex; align-items: center; justify-content: center;}.app { width: 100%; margin: 50px auto; flex-direction: column;}.app > h1 { margin-bottom: 30px; color: #2b3467;}form { display: flex; flex-direction: column; width: 80%;}textarea { padding: 20px; border: 1px solid #ddd; outline: none; border-radius: 5px; margin: 5px 0px; box-shadow: 0 2px 8px 0 rgba(99, 99, 99, 0.2);}button { margin-top: 15px; display: inline-block; width: 200px; padding: 20px; cursor: pointer; font-weight: bold; border: none; border-radius: 5px; outline: none; font-size: 18px; background-color: #f0dbdb;}.loading { width: 100%; height: 100vh; background-color: #fefcf3;}.result__container { display: flex; align-items: center; flex-wrap: wrap; margin-top: 30px;}.result__container > div { margin: 5px; flex-direction: column;}.image { width: 400px; height: 300px; margin-bottom: 15px;}
更新 App.js 文件以顯示允許你輸入建議的網站描述的輸入字段。
import React, { useState } from "react";const App = () => { const [description, setDescription] = useState(""); const handleSubmit = (e) => { e.preventDefault(); console.log({ description }); setDescription(""); }; return ( <div className='app'> <h1>Website Idea Generator</h1> <form method='POST' onSubmit={handleSubmit}> <label htmlFor='description'>Enter the description</label> <textarea name='description' rows={6} value={description} onChange={(e) => setDescription(e.target.value)} /> <button>GENERATE</button> </form> </div> );};export default App;
4.2 設置 Node.js 服務器
導航到終端中的服務器文件夾并創建一個 package.JSON 文件。
cd server & npm init -y
安裝 Express、Nodemon 和 CORS 庫。
npm install express cors nodemon
ExpressJS 是一個快速、極簡的框架,它提供了在 Node.js 中構建 Web 應用程序的多種功能,CORS 是一個允許不同域之間通信的 Node.js 包,而 Nodemon 是一個在檢測到文件后自動重啟服務器的 Node.js 工具 變化。
創建一個 index.js 文件——Web 服務器的入口點。
touch index.js
使用 ExpressJS 設置 Node.js 服務器。 當你在瀏覽器中訪問 http://localhost:4000/api 時,下面的代碼片段會返回一個 JSON 對象。
//index.jsconst express = require("express");const cors = require("cors");const app = express();const PORT = 4000;app.use(express.urlencoded({ extended: true }));app.use(express.json());app.use(cors());app.get("/api", (req, res) => { res.json({ message: "Hello world", });});app.listen(PORT, () => { console.log(`Server listening on ${PORT}`);});
安裝 Axios、非官方的 ChatGPT API 庫和 Puppeteer。 ChatGPT API 使用 Puppeteer 作為可選的對等依賴項來自動繞過 Cloudflare 保護。
npm install chatgpt puppeteer axios
要在 server/index.js 文件中使用 ChatGPT API,需要將文件配置為使用 require 和 import 關鍵字來導入庫。
因此,更新 server/package.json 文件以包含 type 關鍵字。
{ "type": "module" }
在 server/index.js 文件的頂部添加下面的代碼片段。
import { createRequire } from "module";const require = createRequire(import.meta.url);//...other code statements
完成最后兩個步驟后,現在可以在 index.js 文件中使用 ChatGPT。
通過將 start 命令添加到 package.json 文件中的腳本列表來配置 Nodemon。 下面的代碼片段使用 Nodemon 啟動服務器。
//In server/package.json"scripts": { "test": "echo "Error: no test specified" && exit 1", "start": "nodemon index.js" },
恭喜! 現在可以使用以下命令啟動服務器。
npm start
5、Node.js 應用與 ChatGPT 通信
在本節中,我們將學習如何通過非官方的 ChatGPT 庫從 Node.js 服務器與 ChatGPT 通信。
該庫使用基于瀏覽器的全自動解決方案,使我們能夠進入——這意味著它執行完全的瀏覽器自動化,使我們能夠登錄 OpenAI 網站、解決驗證碼并通過 OpenAI cookie 發送消息。
你已經在上一節中安裝了庫; 接下來,將 ChatGPT API 庫導入 index.js 文件,如下所示。 ChatGPT API 使用 Puppeteer 作為可選的對等依賴項來自動繞過 Cloudflare 保護。
import { ChatGPTAPIBrowser } from "chatgpt";
我們需要 ChatGPT 為用戶指定的任何描述生成域名,并為 Stable Diffusion API 創建提示。
因此,在服務器上創建一個路由來接受來自 React 應用程序的描述。
app.post("/api", async (req, res) => { const { prompt } = req.body; console.log(prompt);});
在 React 應用程序中創建一個函數,該函數在用戶提交表單后將描述發送到服務器上的 /api 端點
async function sendDescription() { try { const request = await fetch("http://localhost:4000/api", { method: "POST", body: JSON.stringify({ prompt: description, }), headers: { Accept: "application/json", "Content-Type": "application/json", }, }); const res = await request.json(); console.log(res); } catch (err) { console.error(err); }}
在包含請求狀態的 React 應用程序中添加一個加載狀態,并在提交表單后調用異步函數。
const [description, setDescription] = useState("");const [loading, setLoading] = useState(false);const handleSubmit = (e) => { e.preventDefault(); // calls the async function sendDescription(); setDescription(""); setLoading(true);};
更新 /api 端點以將描述發送到 ChatGPT 并生成域名并提示 Stable Diffusion。
async function chatgptFunction(content) { try { const api = new ChatGPTAPIBrowser({ email: "YOUR_CHATGPT_EMAIL_ADDRESS", password: "YOUR_CHATGPT_PASSWORD", }); await api.initSession(); // sends the instruction for the domain name to ChatGPT const getDomainName = await api.sendMessage( `Can you generate a domain name for a website about: ${content}` ); let domainName = getDomainName.response; // sends the instruction for the prompt to ChatGPT const generatePrompt = await api.sendMessage( `I have a website for ${content}, and I want to generate a logo for it, can you generate a prompt for dall-e for me? make it long like 50 words, you don't need to tell me why you generated the prompt` ); const diffusionPrompt = generatePrompt.response; console.log({ domainName, diffusionPrompt }); } catch (err) { console.error(err); }}app.post("/api", async (req, res) => { const { prompt } = req.body; const result = await chatgptFunction(prompt); res.json({ message: "Retrieved successfully!" });});
上面的代碼片段使用 Puppeteer 啟動瀏覽器并使你能夠自動登錄到 ChatGPT 帳戶。 身份驗證后,ChatGPT 處理請求并返回響應。
在接下來的部分中,我將指導你如何將生成的提示發送到 Stable Diffusion API。
6、如何與 Stable Diffusion API 交互
要與 Stable Diffusion API 交互,請通過運行以下命令重新啟動 Web UI 進程:
cd stable-diffusion-webui./webui.sh --api
你可以在 http://127.0.0.1:7860/docs 查看可用的 API 端點我們將使用 /sdapi/v1/txt2img 端點進行文本到圖像的轉換。
使用生成的提示作為負載向 /sdapi/v1/txt2img 端點發出 POST 請求。
async function chatgptFunction(content) { try { const api = new ChatGPTAPIBrowser({ email: "asaoludavid234@yahoo.com", password: "davidasaolu", }); await api.initSession(); const getDomainName = await api.sendMessage( `Can you generate a domain name for a website about: ${content}` ); let domainName = getDomainName.response; const generatePrompt = await api.sendMessage( `I have a website for ${content}, and I want to generate a logo for it, can you generate a prompt for dall-e for me? make it long like 50 words, you don't need to tell me why you generated the prompt` ); const diffusionPrompt = generatePrompt.response; // Makes a POST request via Axios with the prompt as the payload const request = await axios.post("http://127.0.0.1:7860/sdapi/v1/txt2img", { prompt: diffusionPrompt, }); // returns the generated logo and the domain name let logoImage = await request.data.images; return { logoImage, domainName }; } catch (err) { console.error(err); }}
從上面的代碼片段中,/sdapi/v1/txt2img 端點接受一個名為 prompt 的必需參數——要生成的圖像的文本描述。
更新 Node.js 服務器上的 /api 端點以保存結果并將其發送到 React.js 應用程序。
// holds the resultsconst database = [];app.post("/api", async (req, res) => { const { prompt } = req.body; const result = await chatgptFunction(prompt); // saves the result to the database array database.push(result); // return the result as a response res.json({ message: "Retrieved successfully!", result: database });});
6、使用 React 應用程序顯示結果
更新 sendDescription 函數以接收來自服務器的響應。
// React state that holds the resultconst [result, setResult] = useState([]);async function sendDescription() { try { const request = await fetch("http://localhost:4000/api", { method: "POST", body: JSON.stringify({ prompt: description, }), headers: { Accept: "application/json", "Content-Type": "application/json", }, }); const res = await request.json(); if (res.message) { // update the loading and result states setLoading(false); setResult(res.result); } } catch (err) { console.error(err); }}
創建一個 Loading 組件,只要請求掛起,它就會顯示給用戶。
import React from "react";const Loading = () => { return ( <div className='loading'> <h1>Loading, please wait...</h1> </div> );};export default Loading;
添加下面的代碼片段以在請求掛起時顯示組件。
if (loading) return <Loading />;
更新組件以呈現如下所示生成的結果。
return ( <div className='app'> <h1>Website Idea Generator</h1> <form method='POST' onSubmit={handleSubmit}> <label htmlFor='description'>Enter the description</label> <textarea name='description' rows={6} value={description} onChange={(e) => setDescription(e.target.value)} /> <button>GENERATE</button> </form> <div className='result__container'> {result.length > 0 && result.map((item, index) => ( <div key={index}> <img src={`data:image/png;base64,${item.logoImage}`} alt={item.domainName} className='image' /> <p>Domain: {item.domainName}</p> </div> ))} </div> </div>);
面的代碼片段顯示了為各種請求生成的徽標和域名。 恭喜!你已經完成了本教程的項目。
以下是雞尾酒網站獲得的結果示例:

7、結束語
到目前為止,你已經學會了:
- 什么是穩定擴散,
- 如何在你的計算機上安裝和設置 Stable Diffusion
- 如何從 Node.js 應用程序向 ChatGPT 發送消息,以及
- 如何通過 Stable Diffusion API 從文本生成圖像。
本教程引導你完成了一個應用程序示例,你可以使用 Stable Diffusion 和 ChatGPT 構建該應用程序。 這些 AI 技術可用于創建適用于各個領域的強大應用程序。
本教程的源代碼可在此處獲得。
原文鏈接:http://www.bimant.com/blog/create-ai-driven-website/
